Vue.js in Action
Introduction
What is Vue?
Vue (pronounced /vjuː/, like view) is a JavaScript framework for building user interfaces. It builds on top of standard HTML, CSS, and JavaScript and provides a declarative, component-based programming model that helps you efficiently develop user interfaces of any complexity.
Here is a minimal example:
import { createApp, ref } from 'vue'

createApp({
  setup() {
    return {
      count: ref(0)
    }
  }
}).mount('#app')
<div id="app">
  <button @click="count++">
    Count is: 8
  </button>
</div>
The above example demonstrates the two core features of Vue:
-
Declarative Rendering: Vue extends standard HTML with a template syntax that allows us to declaratively describe HTML output based on JavaScript state.
-
Reactivity: Vue automatically tracks JavaScript state changes and efficiently updates the DOM when changes happen.
Prerequisites
The rest of the documentation assumes basic familiarity with HTML, CSS, and JavaScript. If you are totally new to frontend development, it might not be the best idea to jump right into a framework as your first step - grasp the basics and then come back! You can check your knowledge level with these overviews for JavaScript, HTML and CSS if needed. Prior experience with other frameworks helps, but is not required.
The Progressive Framework
Vue is a framework and ecosystem that covers most of the common features needed in frontend development. But the web is extremely diverse - the things we build on the web may vary drastically in form and scale. With that in mind, Vue is designed to be flexible and incrementally adoptable. Depending on your use case, Vue can be used in different ways:
- Enhancing static HTML without a build step
- Embedding as Web Components on any page
- Single-Page Application (SPA)
- Fullstack / Server-Side Rendering (SSR)
- Jamstack / Static Site Generation (SSG)
- Targeting desktop, mobile, WebGL, and even the terminal
If you find these concepts intimidating, don’t worry! The tutorial and guide only require basic HTML and JavaScript knowledge, and you should be able to follow along without being an expert in any of these.
If you are an experienced developer interested in how to best integrate Vue into your stack, or you are curious about what these terms mean, we discuss them in more detail in Ways of Using Vue.
Despite the flexibility, the core knowledge about how Vue works is shared across all these use cases. Even if you are just a beginner now, the knowledge gained along the way will stay useful as you grow to tackle more ambitious goals in the future. If you are a veteran, you can pick the optimal way to leverage Vue based on the problems you are trying to solve, while retaining the same productivity. This is why we call Vue “The Progressive Framework”: it’s a framework that can grow with you and adapt to your needs.
Single-File Components
In most build-tool-enabled Vue projects, we author Vue components using an HTML-like file format called Single-File Component (also known as *.vue files, abbreviated as SFC). A Vue SFC, as the name suggests, encapsulates the component’s logic (JavaScript), template (HTML), and styles (CSS) in a single file. Here’s the previous example, written in SFC format:
<script setup>
import { ref } from 'vue'
const count = ref(0)
</script>

<template>
  <button @click="count++">Count is: 8</button>
</template>

<style scoped>
button {
  font-weight: bold;
}
</style>
SFC is a defining feature of Vue and is the recommended way to author Vue components if your use case warrants a build setup. You can learn more about the how and why of SFC in its dedicated section - but for now, just know that Vue will handle all the build tools setup for you.
API Styles
Vue components can be authored in two different API styles: Options API and Composition API.
Options API
With Options API, we define a component’s logic using an object of options such as data, methods, and mounted. Properties defined by options are exposed on this inside functions, which points to the component instance:
<script>
export default {
  // Properties returned from data() become reactive state
  // and will be exposed on `this`.
  data() {
    return {
      count: 0
    }
  },

  // Methods are functions that mutate state and trigger updates.
  // They can be bound as event handlers in templates.
  methods: {
    increment() {
      this.count++
    }
  },

  // Lifecycle hooks are called at different stages
  // of a component's lifecycle.
  // This function will be called when the component is mounted.
  mounted() {
    console.log(`The initial count is ${this.count}.`)
  }
}
</script>

<template>
  <button @click="increment">Count is: 8</button>
</template>
Composition API
With Composition API, we define a component’s logic using imported API functions. In SFCs, Composition API is typically used with <script setup>. The setup attribute is a hint that makes Vue perform compile-time transforms that allow us to use Composition API with less boilerplate. For example, imports and top-level variables / functions declared in <script setup> are directly usable in the template.
Here is the same component, with the exact same template, but using Composition API and <script setup> instead:
<script setup>
import { ref, onMounted } from 'vue'

// reactive state
const count = ref(0)

// functions that mutate state and trigger updates
function increment() {
  count.value++
}

// lifecycle hooks
onMounted(() => {
  console.log(`The initial count is ${count.value}.`)
})
</script>

<template>
  <button @click="increment">Count is: 8</button>
</template>
Which to Choose?
Both API styles are fully capable of covering common use cases. They are different interfaces powered by the exact same underlying system. In fact, the Options API is implemented on top of the Composition API! The fundamental concepts and knowledge about Vue are shared across the two styles.
The Options API is centered around the concept of a “component instance” (this as seen in the example), which typically aligns better with a class-based mental model for users coming from OOP language backgrounds. It is also more beginner-friendly by abstracting away the reactivity details and enforcing code organization via option groups.
The Composition API is centered around declaring reactive state variables directly in a function scope and composing state from multiple functions together to handle complexity. It is more free-form and requires an understanding of how reactivity works in Vue to be used effectively. In return, its flexibility enables more powerful patterns for organizing and reusing logic.
You can learn more about the comparison between the two styles and the potential benefits of Composition API in the Composition API FAQ.
If you are new to Vue, here’s our general recommendation:
-
For learning purposes, go with the style that looks easier to understand to you. Again, most of the core concepts are shared between the two styles. You can always pick up the other style later.
-
For production use:
- Go with Options API if you are not using build tools, or plan to use Vue primarily in low-complexity scenarios, e.g. progressive enhancement.
- Go with Composition API + Single-File Components if you plan to build full applications with Vue.
You don’t have to commit to only one style during the learning phase. The rest of the documentation will provide code samples in both styles where applicable, and you can toggle between them at any time using the API Preference switches at the top of the left sidebar.
Quick Start
Try Vue Online
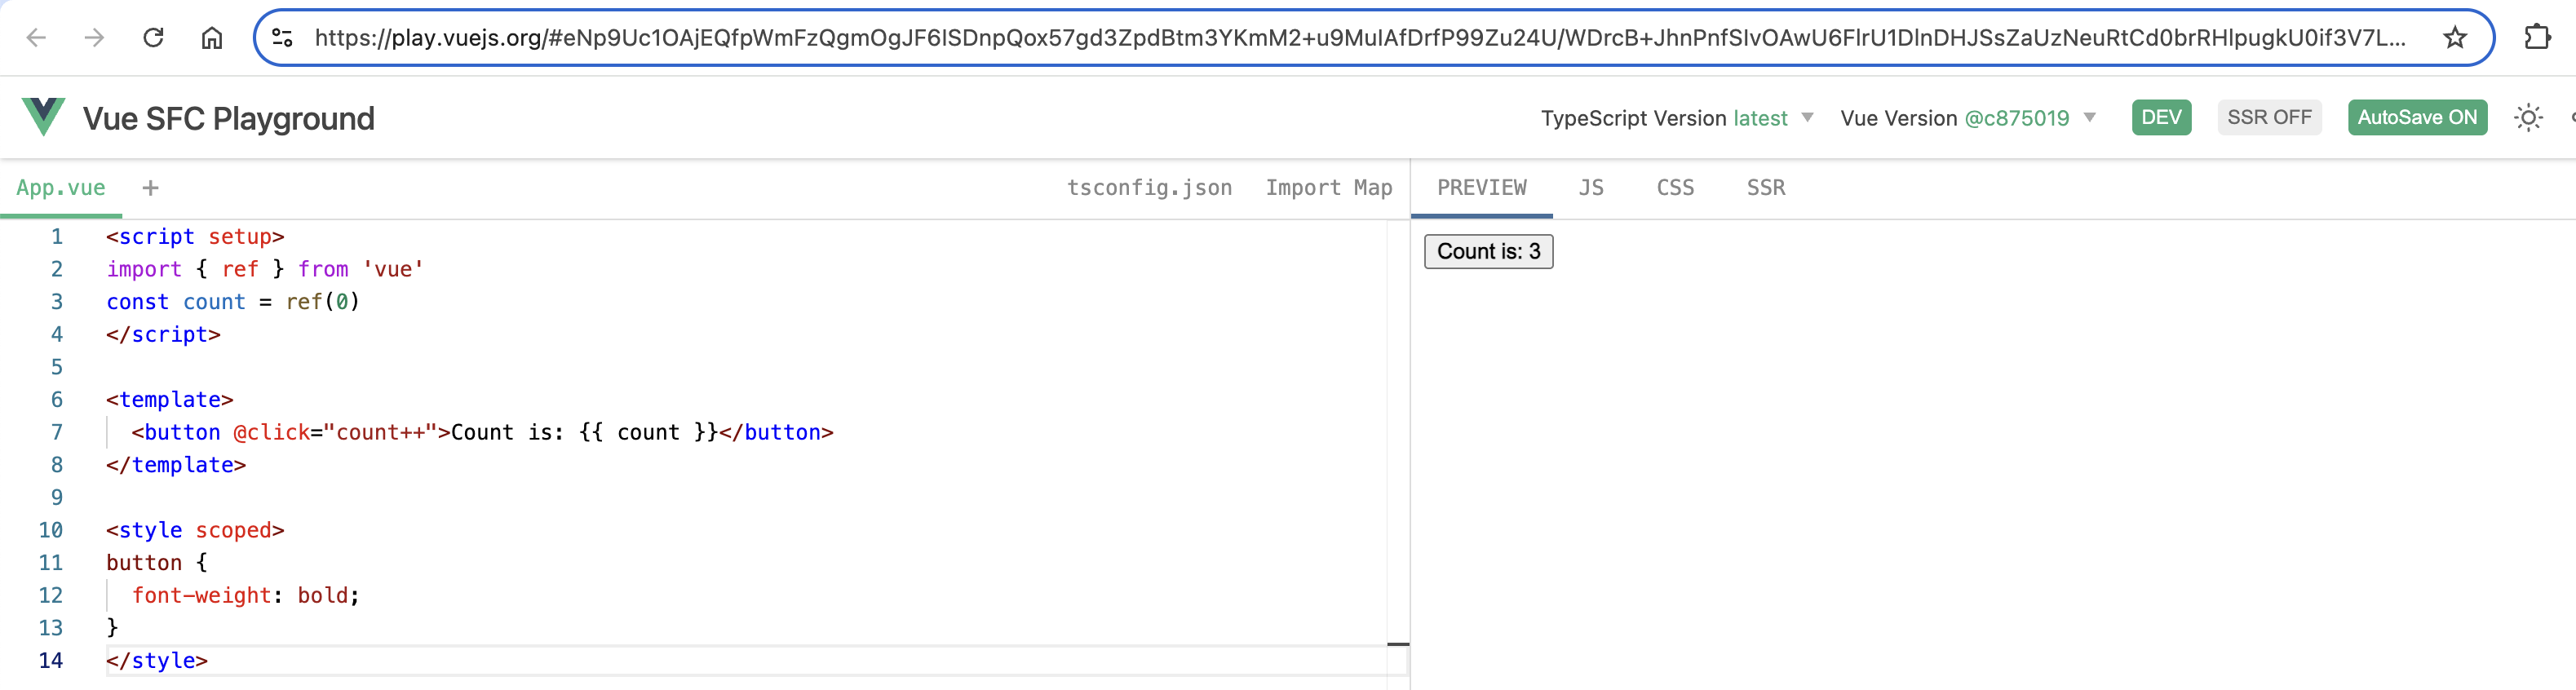
-
To quickly get a taste of Vue, you can try it directly in our Playground.
-
If you prefer a plain
HTMLsetup without any build steps, you can use this JSFiddle as your starting point. -
If you are already familiar with
Node.jsand the concept of build tools, you can also try a complete build setup right within your browser on StackBlitz. -
To get a walkthrough of the recommended setup, watch this interactive Scrimba tutorial that shows you how to run, edit, and deploy your first Vue app.
Creating a Vue Application
Prerequisites
- Familiarity with the command line
- Install Node.js version
18.3or higher
In this section we will introduce how to scaffold a Vue Single Page Application on your local machine. The created project will be using a build setup based on Vite and allow us to use Vue Single-File Components (SFCs).
Make sure you have an up-to-date version of Node.js installed and your current working directory is the one where you intend to create a project. Run the following command in your command line (without the $ sign):
npm create vue@latest
This command will install and execute create-vue, the official Vue project scaffolding tool. You will be presented with prompts for several optional features such as TypeScript and testing support:
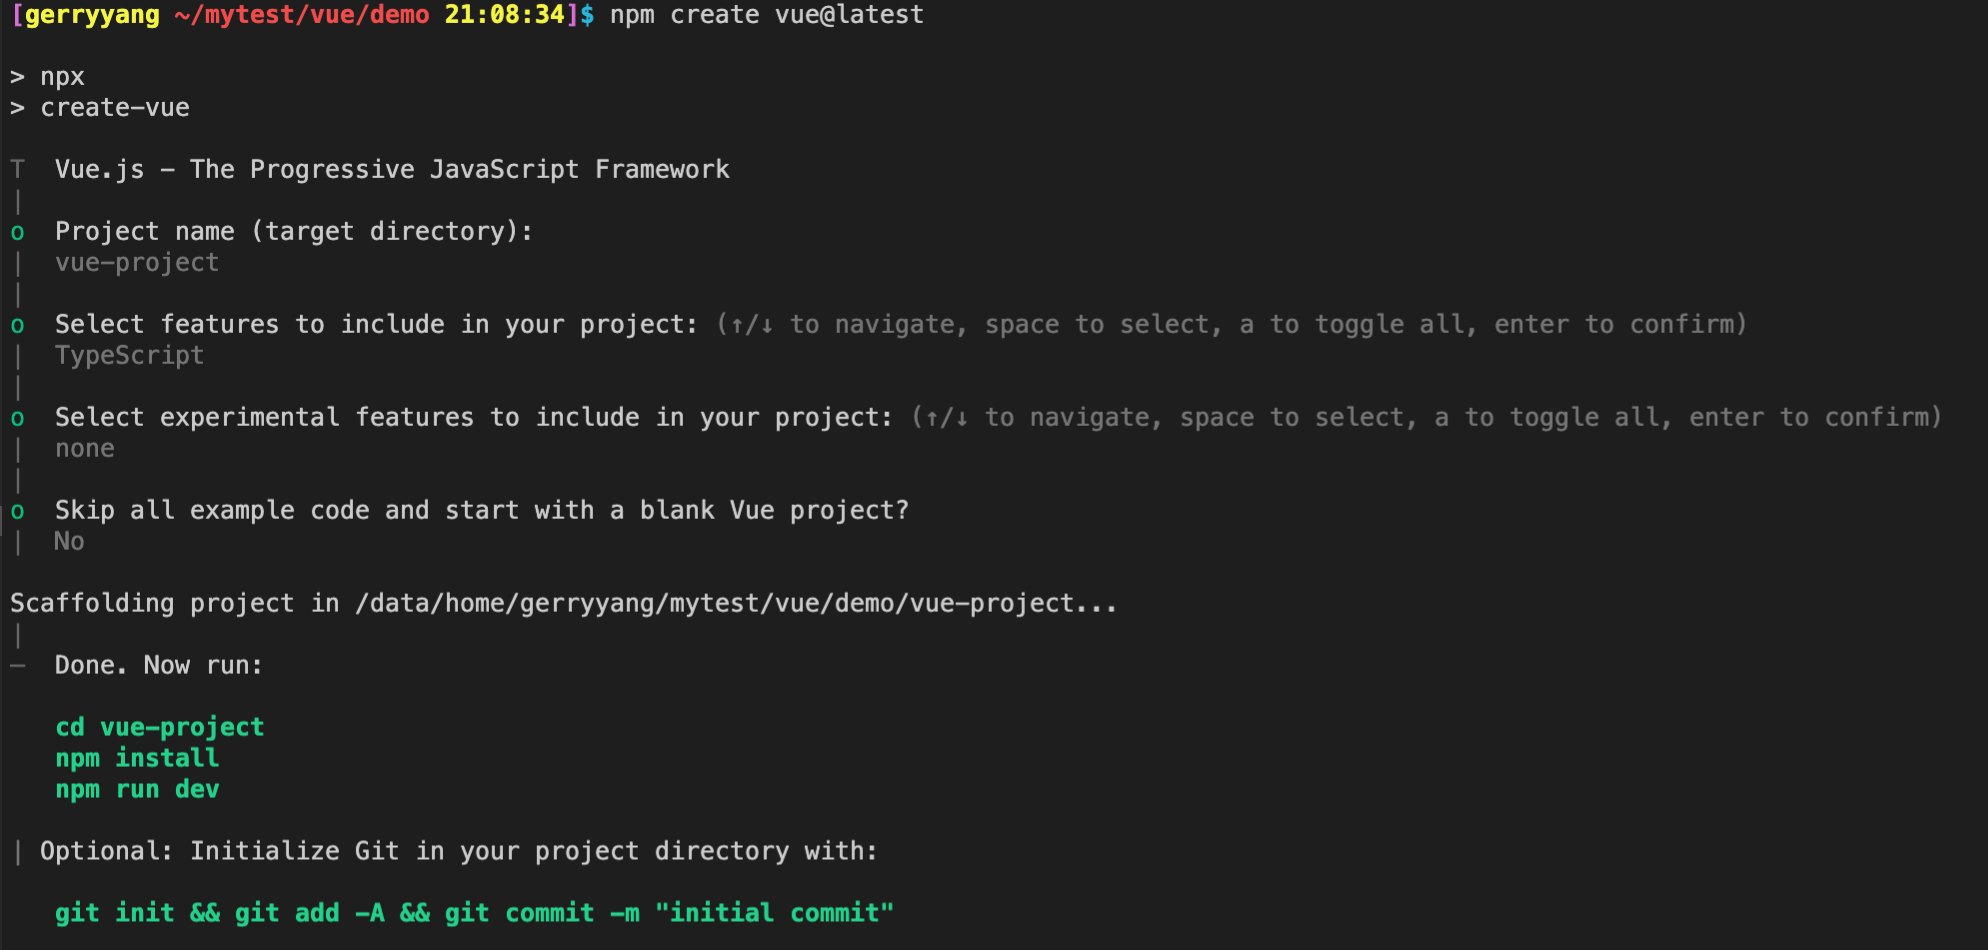
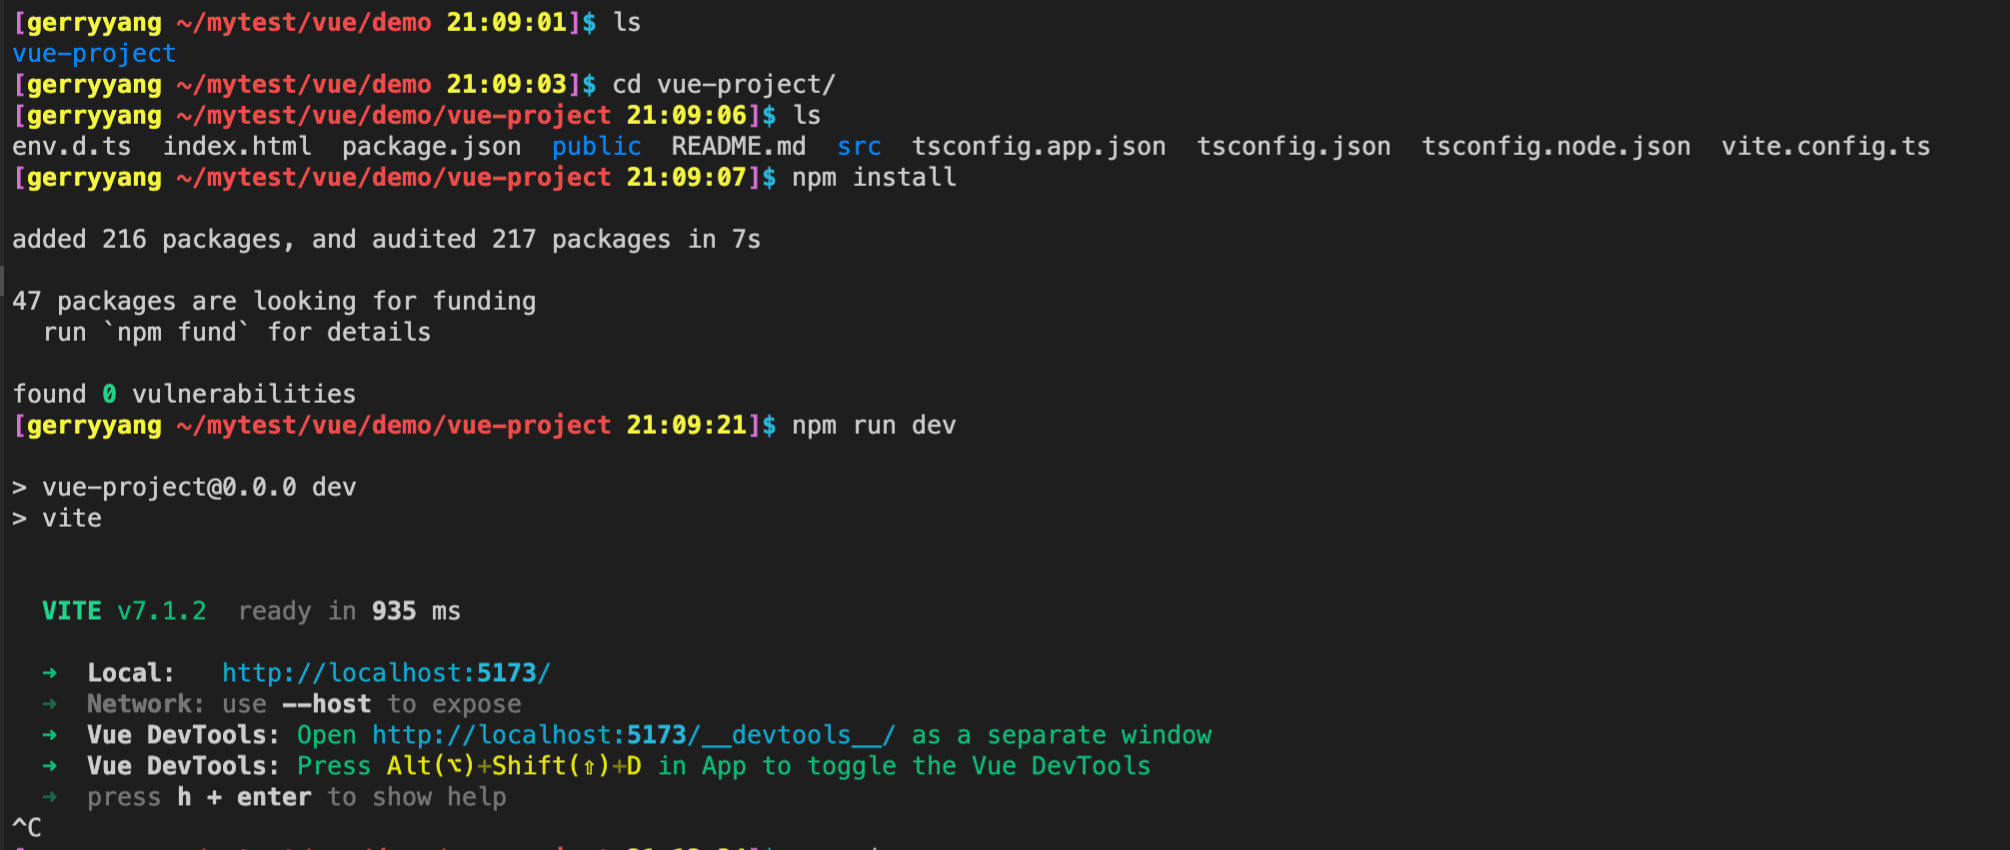
If you are unsure about an option, simply choose No by hitting enter for now. Once the project is created, follow the instructions to install dependencies and start the dev server:
cd <your-project-name>
npm install
npm run dev
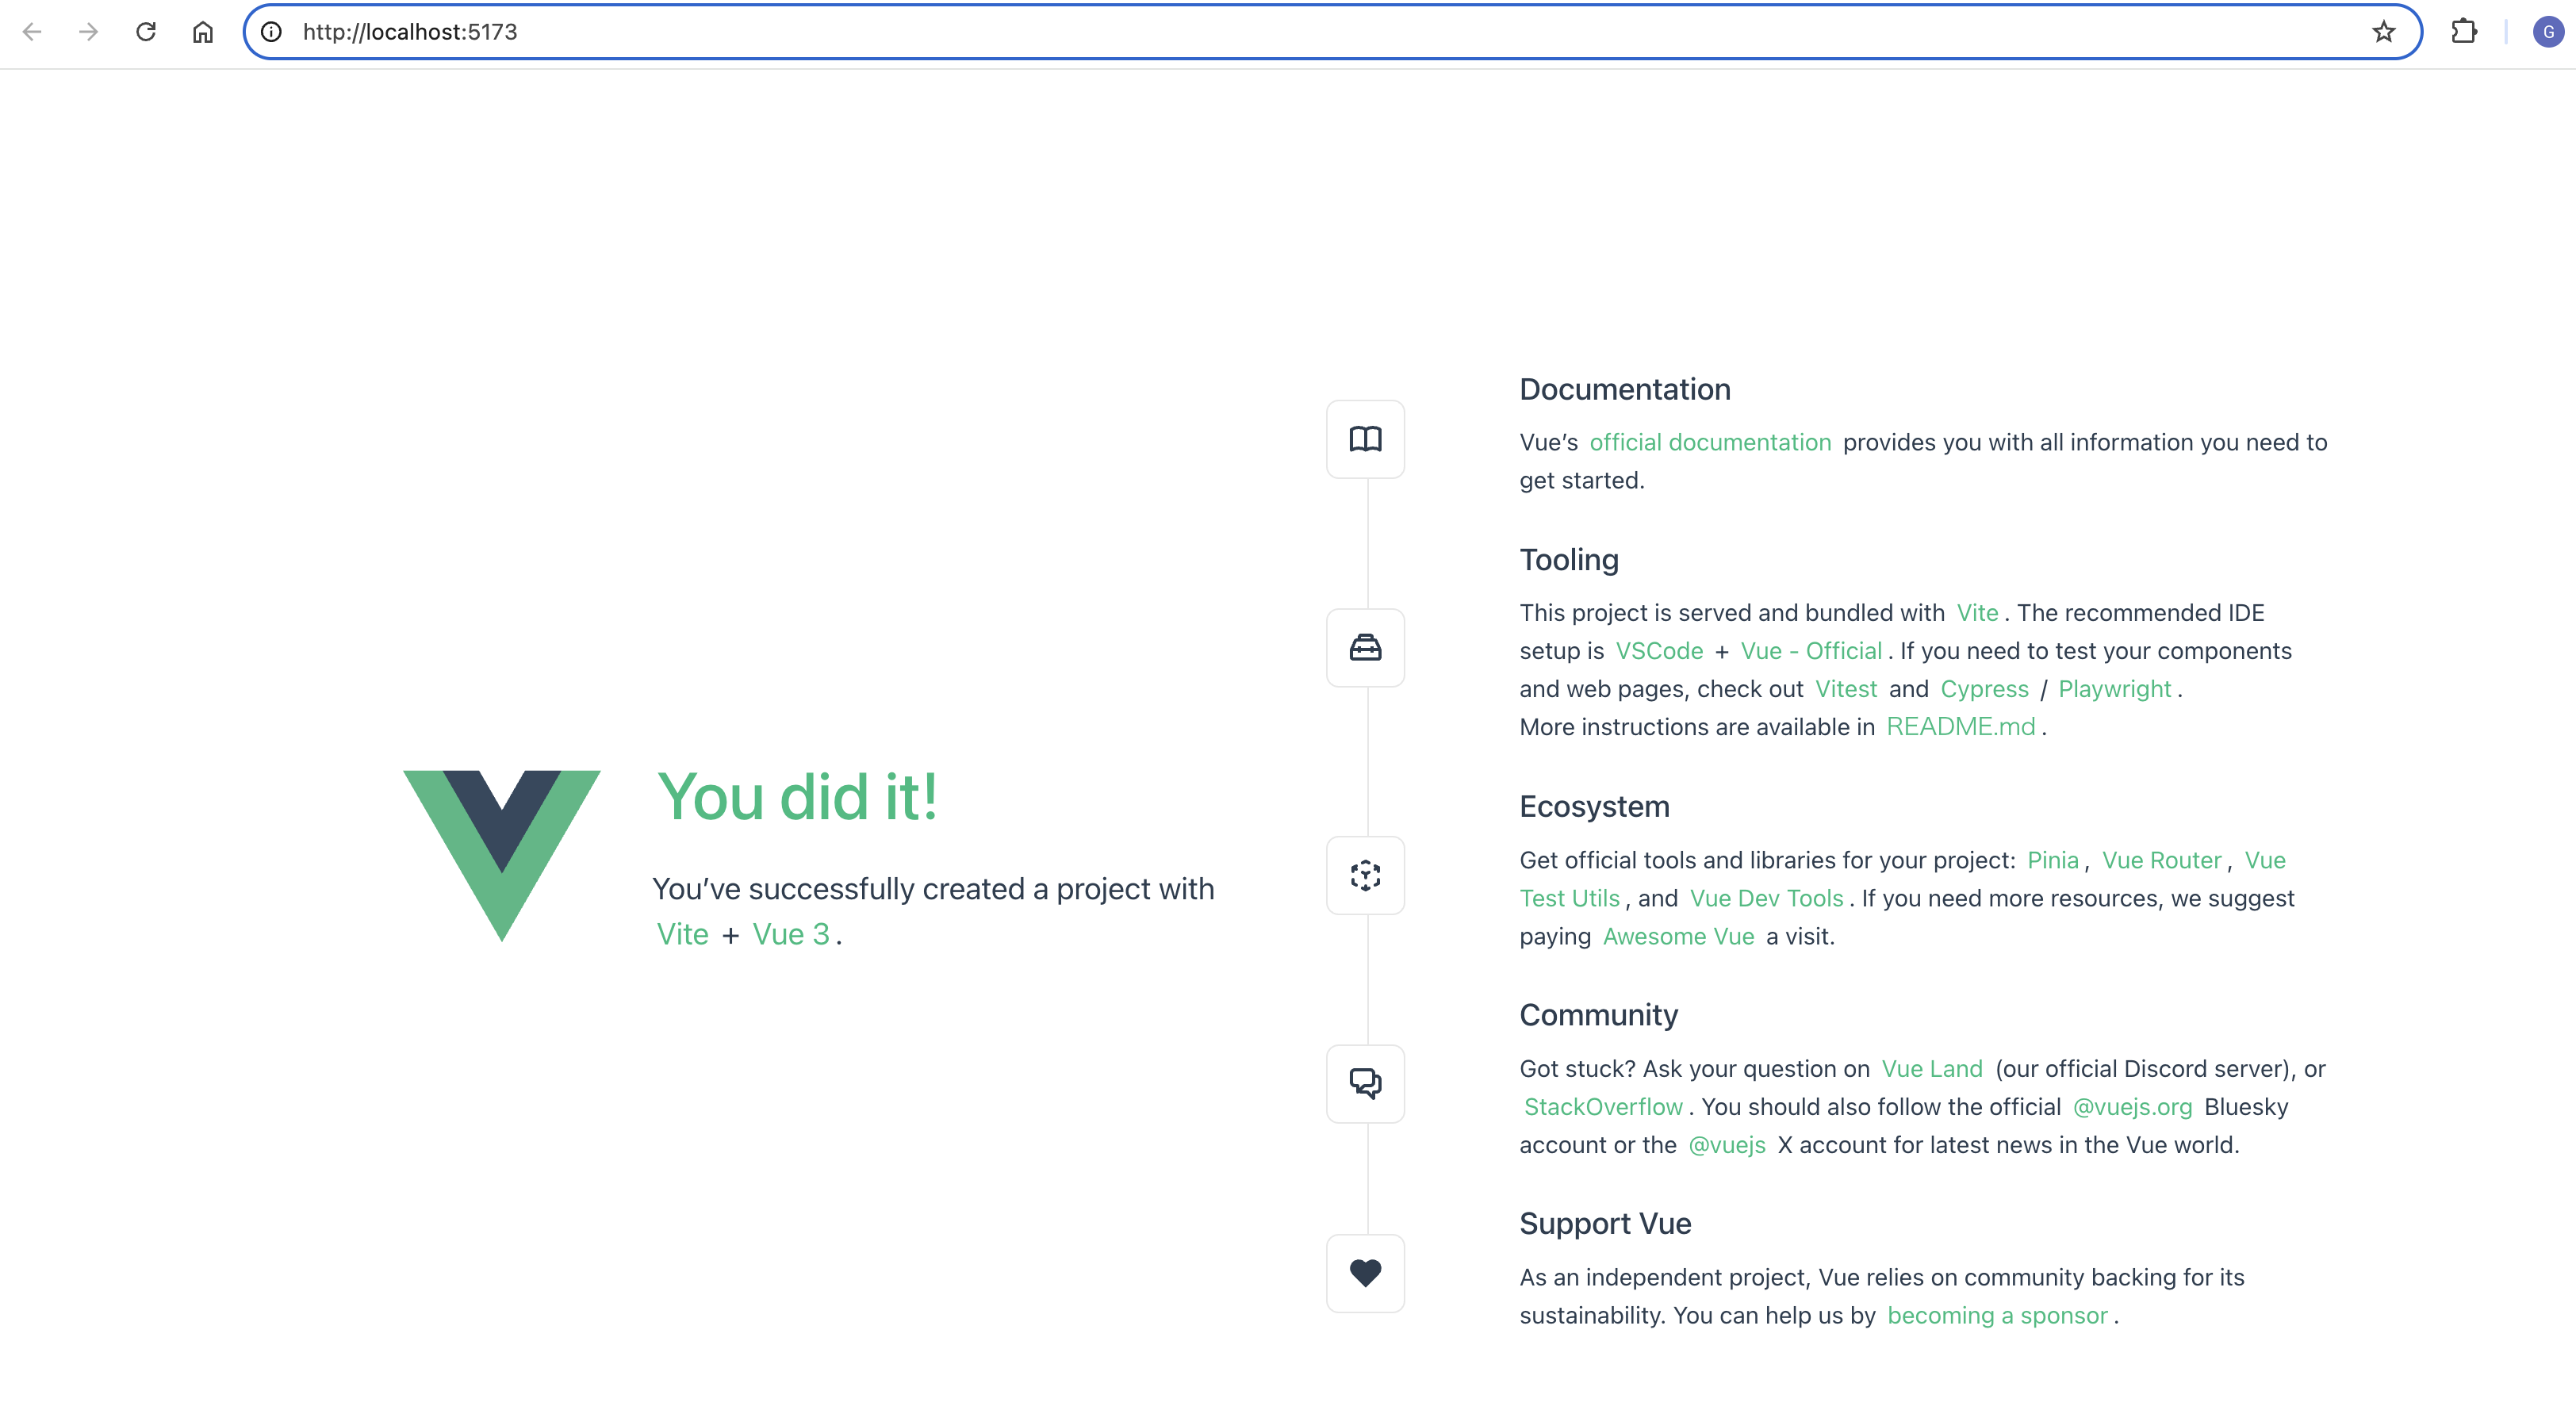
You should now have your first Vue project running! Note that the example components in the generated project are written using the Composition API and <script setup>, rather than the Options API. Here are some additional tips:
-
The recommended IDE setup is Visual Studio Code + Vue - Official extension. If you use other editors, check out the IDE support section.
-
More tooling details, including integration with backend frameworks, are discussed in the Tooling Guide.
-
To learn more about the underlying build tool
Vite, check out the Vite docs. -
If you choose to use
TypeScript, check out the TypeScript Usage Guide.
When you are ready to ship your app to production, run the following:
npm run build
This will create a production-ready build of your app in the project’s ./dist directory. Check out the Production Deployment Guide to learn more about shipping your app to production.
Creating a Vue Application
The application instance
Every Vue application starts by creating a new application instance with the createApp function:
import { createApp } from 'vue'

const app = createApp({
  /* root component options */
})
The Root Component
The object we are passing into createApp is in fact a component. Every app requires a “root component” that can contain other components as its children.
If you are using Single-File Components, we typically import the root component from another file:
import { createApp } from 'vue'
// import the root component App from a single-file component.
import App from './App.vue'

const app = createApp(App)
While many examples in this guide only need a single component, most real applications are organized into a tree of nested, reusable components. For example, a Todo application’s component tree might look like this:
App (root component)
├─ TodoList
│  └─ TodoItem
│     ├─ TodoDeleteButton
│     └─ TodoEditButton
└─ TodoFooter
   ├─ TodoClearButton
   └─ TodoStatistics
In later sections of the guide, we will discuss how to define and compose multiple components together. Before that, we will focus on what happens inside a single component.
Mounting the App
An application instance won’t render anything until its .mount() method is called. It expects a “container” argument, which can either be an actual DOM element or a selector string:
<div id="app"></div>
app.mount('#app')
The content of the app’s root component will be rendered inside the container element. The container element itself is not considered part of the app.
The .mount() method should always be called after all app configurations and asset registrations are done. Also note that its return value, unlike the asset registration methods, is the root component instance instead of the application instance.
In-DOM Root Component Template
The template for the root component is usually part of the component itself, but it is also possible to provide the template separately by writing it directly inside the mount container:
<div id="app">
  <button @click="count++">8</button>
</div>
import { createApp } from 'vue'

const app = createApp({
  data() {
    return {
      count: 0
    }
  }
})

app.mount('#app')
Vue will automatically use the container’s innerHTML as the template if the root component does not already have a template option.
In-DOM templates are often used in applications that are using Vue without a build step. They can also be used in conjunction with server-side frameworks, where the root template might be generated dynamically by the server.
App Configurations
The application instance exposes a .config object that allows us to configure a few app-level options, for example, defining an app-level error handler that captures errors from all descendant components:
app.config.errorHandler = (err) => {
  /* handle error */
}
The application instance also provides a few methods for registering app-scoped assets. For example, registering a component:
app.component('TodoDeleteButton', TodoDeleteButton)
This makes the TodoDeleteButton available for use anywhere in our app. We will discuss registration for components and other types of assets in later sections of the guide. You can also browse the full list of application instance APIs in its API reference.
Make sure to apply all app configurations before mounting the app!
Multiple application instances
You are not limited to a single application instance on the same page. The createApp API allows multiple Vue applications to co-exist on the same page, each with its own scope for configuration and global assets:
const app1 = createApp({
  /* ... */
})
app1.mount('#container-1')

const app2 = createApp({
  /* ... */
})
app2.mount('#container-2')
If you are using Vue to enhance server-rendered HTML and only need Vue to control specific parts of a large page, avoid mounting a single Vue application instance on the entire page. Instead, create multiple small application instances and mount them on the elements they are responsible for.
Refer
- https://vue3js.cn/ (Vue 爱好者)
- https://cn.vuejs.org/ (中文)
- https://vuejs.org/ (英文)